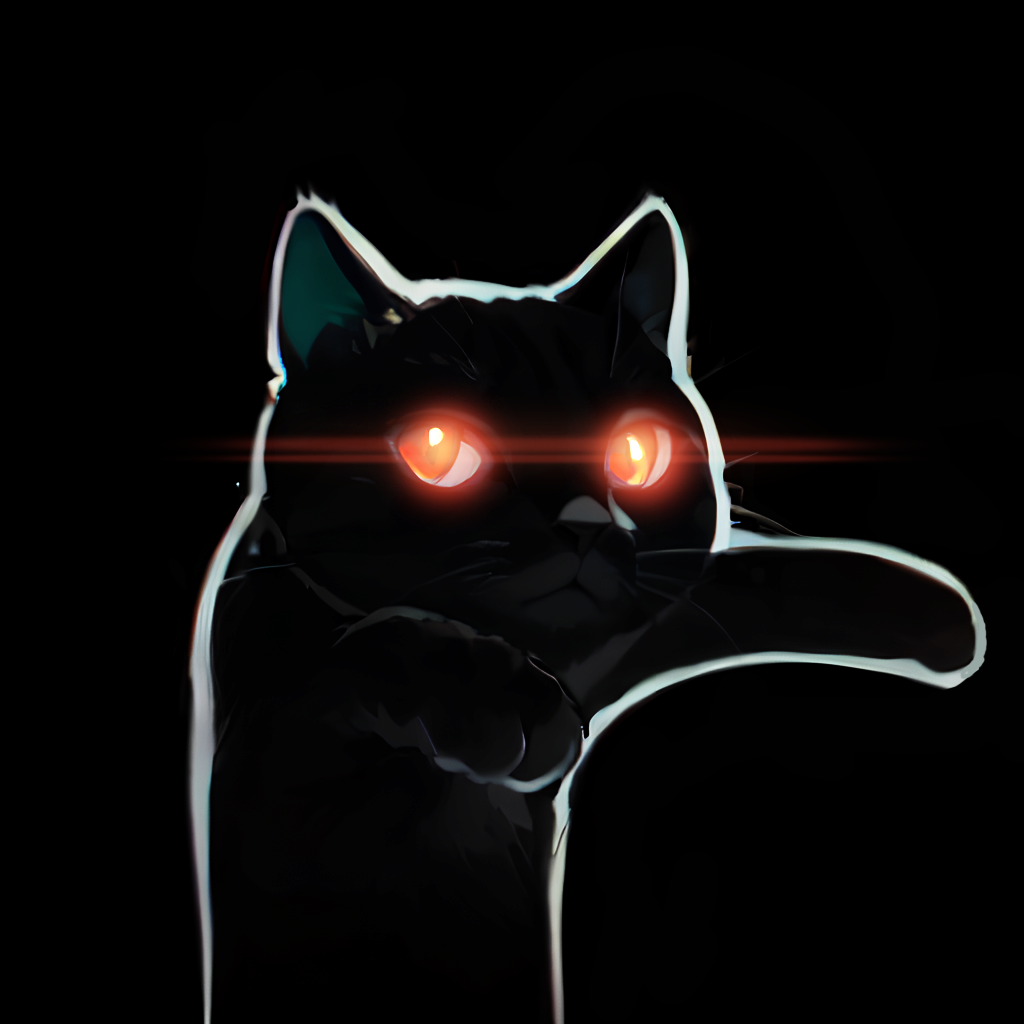
이 튜토리얼은 Unity 2019.3.0b 버전에서 작성됩니다.

이 쉐이더 이펙트는 위 5가지 기술로 구현이 됩니다, 튜토리얼에서는 위 기술들을 1개씩 소개하며 진행하겠습니다.
0. 헥사곤 패턴 리소스 제작
https://darkcatgame.tistory.com/82
헥사곤 패턴 구체 모델링 & 텍스처 생성
헥사곤 구체는 쉴드같은 sci-fi 효과를 표현할 때 사용합니다. 가장 쉬운방법으로 위 헥사곤 텍스처를 구체에다가 입히면 이상한 결과물이 나옵니다. 좌측이 일반 헥사곤 텍스처를 입힌 결과물이고, 우측이 이..
darkcatgame.tistory.com
해당 튜토리얼을 시작하기 전에 위 포스팅에서 헥사곤 패턴 구체 & 텍스처 제작을 먼저 해봅시다.
1. Transparent & Rim Light
Unity Unlit Shader로 쉐이더를 작성합니다.
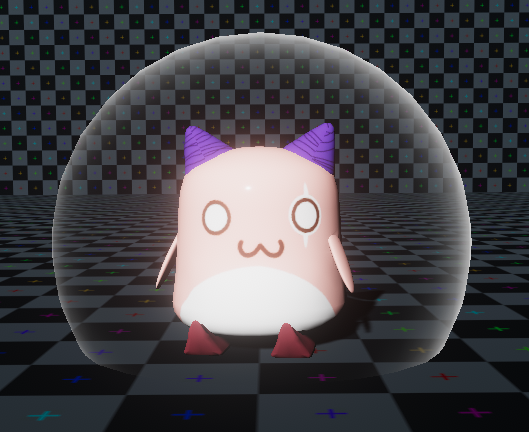
//! 반투명 렌더Queue, Projector 무시, 반투명 렌더타입설정
Tags {"Queue" = "Transparent" "IgnoreProjector" = "True" "RenderType" = "Transparent"}

Cull back							//! 오브젝트 뒷면 그리지 않는다
ZWrite Off							//! Z Buffer를 사용하지 않는다
Blend SrcAlpha OneMinusSrcAlpha		//! 알파블랜드
베리어 내부의 오브젝트를 투명하게 보여주기 위해 위 코드를 작성하여 반투명 쉐이더로 설정합니다.
 struct appdata
 {
     float4 vertex : POSITION;
     float2 uv : TEXCOORD0;
     float3 normal : NORMAL;
 };

struct v2f
{
    float4 vertex : SV_POSITION;
    float2 uv : TEXCOORD0;
    half3 viewDir : TEXCOORD1;
    half3 worldNormal : TEXCOORD2;
};
appdata와 v2f구조체는 위와 같이 작성합니다.
appdata는 메쉬 버텍스 정보는 받는 구조체이고 v2f는 버텍스 쉐이더 -> 프레그먼트 쉐이더로 정보 전달하는 구조체입니다.
v2f vert (appdata v)
{
    v2f o;
    o.vertex = UnityObjectToClipPos(v.vertex);
    o.uv = TRANSFORM_TEX(v.uv, _MainTex);
    o.viewDir = normalize(WorldSpaceViewDir(v.vertex));		//! 시선 월드 벡터
    o.worldNormal = UnityObjectToWorldNormal(v.normal);		//! 월드 노말 벡터

	return o;
}
버텍스 쉐이더에서 위와 같이 각 데이터를 계산하여 프레그먼트쉐이더로 넘겨줍니다.
//! Properties
_FresnelPow("Fresnel Pow", float) = 2
_FresnelMul("Fresnel Mul", float) = 1
[HDR] _FresnelColor("Fresnel Color", Color) = (1,1,1,1)

-----------------------------------------

//! 매칭 변수
float _FresnelMul;
float _FresnelPow;
half4 _FresnelColor;

-----------------------------------------

//! Rim 함수
fixed Fuc_Rim(half fNDotV, half fPow, half fMul)
{
    half fInverseRim = 1 - abs(fNDotV);
    return saturate((pow(fInverseRim, fPow) * fMul));
}

-----------------------------------------

//! 프레그먼트 쉐이더
fixed4 frag (v2f i) : SV_Target
{
    fixed3 worldNormal = saturate(i.worldNormal);
    fixed fNDotV = dot(i.viewDir, worldNormal);

    fixed fRim_Basic = Fuc_Rim(fNDotV, _FresnelPow, _FresnelMul);
	half4 fRim_Color = fRim_Basic * _FresnelColor;

    return fRim_Color;
}
프레그먼트 쉐이더에서 간단하게 NDotV를 계산하여 림라이트를 구현합니다.
림라이트 공식은 이후 여러번 계산할 예정이라 Fuc_Rim이라는 함수로 따로 작성합니다.
2. Normal Mapping
헥사곤 베리어의 입체감을 확실하게 표현하여 더욱 단단하게 보이게 하기 위해 노멀맵을 적용할 것 입니다.

https://darkcatgame.tistory.com/84?category=814684
Unity Normal Map 구현 & 분석
Normal(법선)이란? Normal이란 메쉬의 버텍스 방향 정보를 뜻합니다, 일반적으로 물체의 표면 방향을 의미합니다. 위와 같이 단순한 구체 모델은 Normal 방향이 정직하게 표면 방향을 향합니다. 하지만 위와..
darkcatgame.tistory.com
이번 파트는 노멀맵을 적용하는 과정으로 노멀맵에 대한 자세한 내용은 위 포스팅을 참고하시길 바랍니다.
//! Properties
_BumpTex("Normal Texture", 2D) = "bump" {}
_NormalMul("Normal Intensity", Range(0, 3)) = 1

-----------------------------------------

//! sturct v2f
float3 T : TEXCOORD2;
float3 B : TEXCOORD3;
float3 N : TEXCOORD4;

-----------------------------------------

//! 매칭 변수
sampler2D _BumpTex;
float4 _BumpTex_ST;
half _NormalMul;

-----------------------------------------

//! 버텍스 쉐이더
//o.worldNormal = UnityObjectToWorldNormal(v.normal);	//! 프레그먼트에서 노말 계산하므로 제거
Fuc_LocalNormal2TBN(v.normal, v.tangent, o.T, o.B, o.N);

-----------------------------------------

//! 프레그먼트 쉐이더
//fixed3 worldNormal = saturate(i.worldNormal); //! 제거
half3 fTangnetNormal = UnpackNormal(tex2D(_BumpTex, i.uv * _BumpTex_ST.rg));
fTangnetNormal.xy *= _NormalMul; // 노말강도 조절
fixed3 worldNormal = Fuc_TangentNormal2WorldNormal(fTangnetNormal, i.T, i.B, i.N);
위 포스팅을 참고하여 기존 버텍스에서 계산된 월드 노멀 코드를 제거하고 노멀맵적용 코드로 변경합니다.

이전에 만든 헥사곤 패턴 노말맵 텍스처를 적용합니다.
3. GrapPass & Distortion
3.1 GrapPass

GrapPass는 메쉬의 뒷면에 기록되는 픽셀 정보를 가져오는 역할을 합니다, 이를 이용해 베리어 안쪽에 있는 물체를 굴절 시킬 수 있습니다.
//! Grabpass 추가

ZWrite Off							//! Z Buffer를 사용하지 않는다
Blend SrcAlpha OneMinusSrcAlpha		//! 알파블랜드

GrabPass
{
	"_GrapPass"
}


-------------------------------------

//! struct v2f
float4 screenPosition : TEXCOORD5;	//! GrapPass의 UV역할을 하는 screenUV

-------------------------------------

//! 변수
sampler2D _GrapPass;

-------------------------------------

//! 버텍스 쉐이더
o.screenPosition = ComputeScreenPos(o.vertex);	//! ScreenUV 계산
COMPUTE_EYEDEPTH(o.screenPosition.z);	//! View 공간 거리

--------------------------------------

//! 프레그먼트 쉐이더
fixed4 fGrapPass = tex2Dproj(_GrapPass, i.screenPosition + 0.5f);	//! GrapPass 데이터

float4 fFinalColor = 1;
fFinalColor.rgb = fRim_Color.rgb + fGrapPass.rgb;
fFinalColor.a = fRim_Color.a + fGrapPass.a;

fFinalColor.a = saturate(fFinalColor.a);

return fFinalColor;
3.2 Distortion

GrapPass로 가져온 샘플러데이터를 UV Distortion기술을 통해 베리어 너머의 오브젝트가 굴절되는 것을 표현 했습니다.
//! Properties
_DistortionTex("Distortion Texture", 2D) = "bump" {}
_DistortionMul("Distortion Mul", float) = 0.08

---------------------------------------------------

//! 변수
sampler2D _DistortionTex;
float4 _DistortionTex_ST;
half _DistortionMul;

---------------------------------------------------

//! 프레그먼트 쉐이더
float3 fDistortionTex = UnpackNormal(tex2D(_DistortionTex, i.uv * _DistortionTex_ST.rg + _DistortionTex_ST.ba));
fixed2 fDistortionData = fDistortionTex.rg * _DistortionMul;
fixed4 fGrapPass = tex2Dproj(_GrapPass, i.screenPosition + float4(fDistortionData.r, fDistortionData.g, 0, 0));
4. Depth Fade
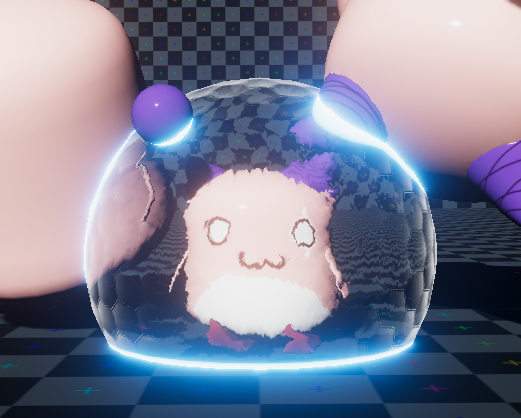
Depth Fade는 베리어 오브젝트에 겹치는 오브젝트를 마스킹해서 위와 같은 효과를 내는 것을 구현합니다.
이 기술을 사용하기 위해서는 Depth Buffer라는 것을 알아야합니다, 아래 포스팅을 참고해주시길 바랍니다.
https://darkcatgame.tistory.com/79?category=814684
[Unity PostProcess] Depth Buffer & Depth of Field
Depth Buffer. Z-Buffer라고도 하며 카메라 기준으로 픽셀의 깊이 정보를 뜻합니다, 위 사진은 해당 정보를 시각화 하여 출력한 결과입니다. Depth Buffer를 이용해 Soft Particle이나 Depth of Field효과 만들..
darkcatgame.tistory.com
//! Properties
[HDR] _DepthIntersectColor("Overlap Color", Color) = (1,1,1,1)	//! 겹침 색상
_DepthFadeMul("DepthFadeMul", float) = 1						//! 겹침 마스크 강도

----------------------------------------------

//! 변수
half4 _DepthIntersectColor;
fixed _DepthFadeMul;
sampler2D _CameraDepthTexture;	//! Depth Buffer

----------------------------------------------

//! 프레그먼트 쉐이더
//! 텝스 텍스처를 LinearEyeDepth함수를 통해 월드->뷰 공간으로 변환
float fDepthMap_R = abs(LinearEyeDepth(tex2Dproj(_CameraDepthTexture, i.screenPosition).r) - i.screenPosition.z);
fixed fDepthIntersect = saturate(fDepthMap_R / _DepthFadeMul);
half4 fDepthIntersectColor = (1 - fDepthIntersect) * _DepthIntersectColor;
5. Hex Pettern UV Animation
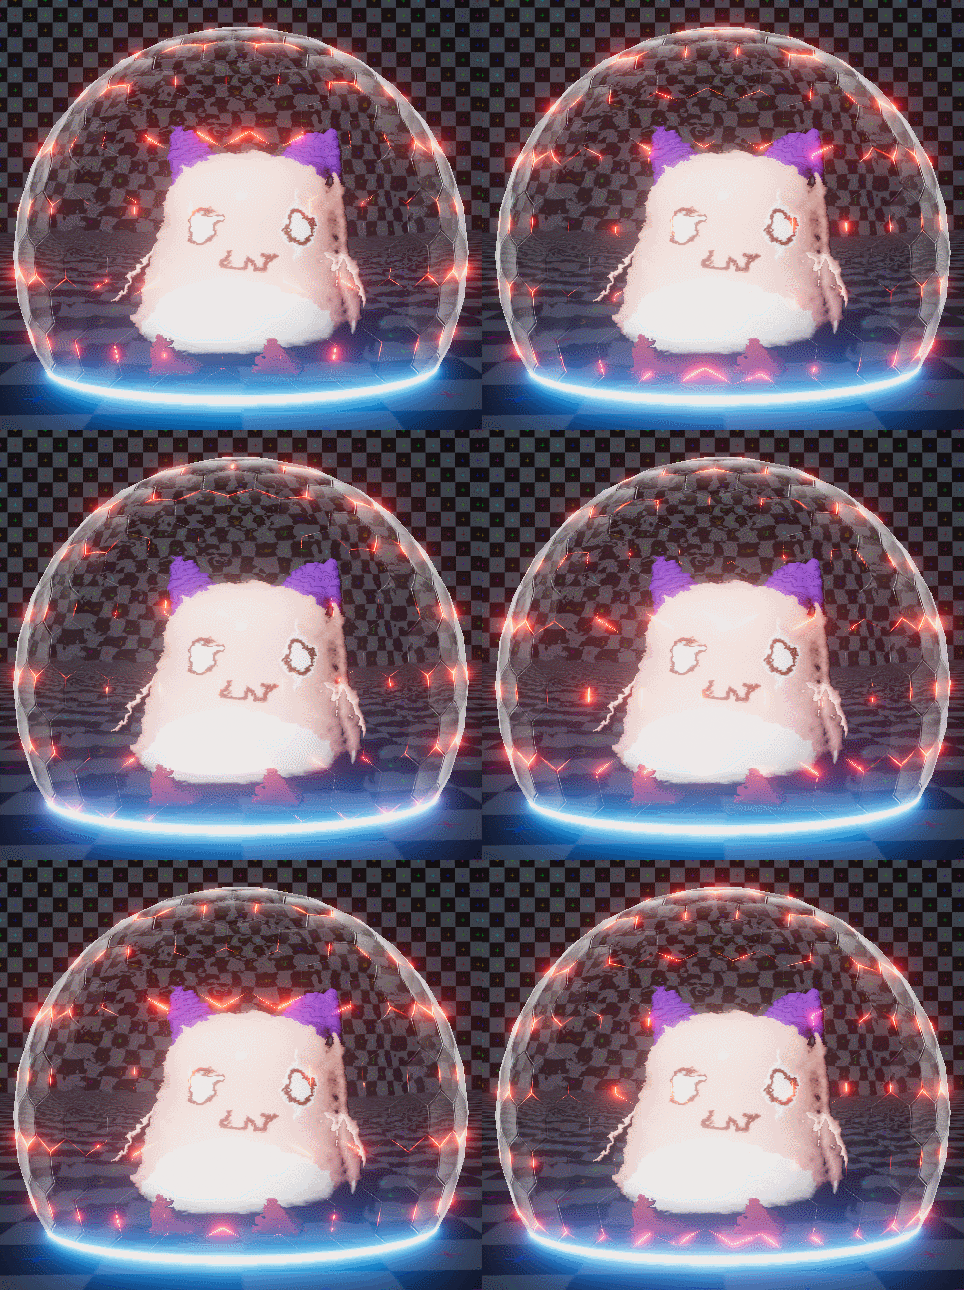
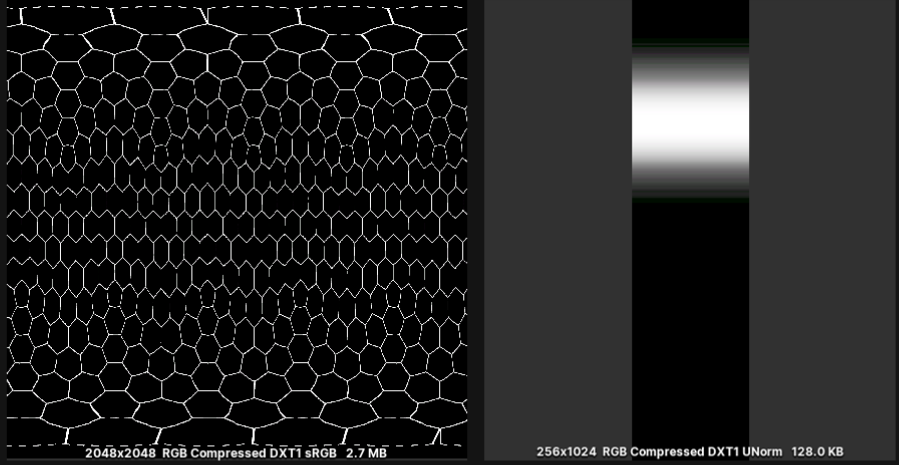
이 효과는 위 두 텍스처를 이용해서 UV 애니메이션해서 구현했습니다.
//! Properties
[HDR] _HexLineColor("Hex Line Color", Color) = (1,1,1,1)
_HexTex("Hex Texture", 2D) = "white" {}
_LineTex("Line Mask Texture", 2D) = "white" {}

-----------------------------------------------

//! 변수
sampler2D _HexTex;
float4 _HexTex_ST;
float4 _HexLineColor;
sampler2D _LineTex;
float4 _LineTex_ST;

-----------------------------------------------

//! 프레그먼트 쉐이더
fixed4 fHexTex = tex2D(_HexTex, i.uv * _HexTex_ST.rg + _HexTex_ST.ba);
fixed4 fLineTex = tex2D(_LineTex, i.uv * _LineTex_ST.rg + float2(0.0f, _Time.y*1.0f));
float4 fHexColor = 1;
fHexColor.rgb = fHexTex.r*fLineTex.r *_HexLineColor.rgb * Fuc_Rim(fNDotV, 7.5f, 7.0f);
fHexColor.a = fHexTex.r*fLineTex.r *_HexLineColor.a;
//작성중
'Unity > Shader & VFX' 카테고리의 다른 글
| 털(Fur) 쉐이더 R&D - 로스트아크에서 털 표현하는 방법 (0) | 2022.11.01 |
|---|---|
| URP 반투명 굴절 구현(Transparent Grabpass) (3) | 2022.03.22 |
| Vertex Fragment - Shadow Receive & Cast (0) | 2020.02.12 |
| [Stencil] 3D 영정사진 (0) | 2020.02.10 |
| Unity Normal Map 구현 & 분석 (6) | 2020.02.05 |
WRITTEN BY
- CatDarkGame
Technical Artist dhwlgn12@gmail.com


